DIY Planter Box From Pallets
We dearest plants and we dear pallets and then this cracking DIY projection was right up our alley. It's unproblematic, it isn't very time-consuming and it's also really cost-efficient, especially if y'all can notice some pallets for free or at a really small price. In any example, let'southward get started. First yous demand to gather your supplies for this stylish pallet planter. The about important part is the pallet or what leftovers you lot might take from previous projects.
 View in gallery
one. Cutting the pallet boards down to size
 View in gallery
 The offset footstep is to cut all the pallet boards down to size using a miter saw. Cut some 16'' by 20'' long pieces and some 1'' by 2'' pieces for the frame. Of course, you lot could likewise use 2'' by 4'' boards if y'all prefer these dimensions. You should always feel free to customize and arrange DIY projects.
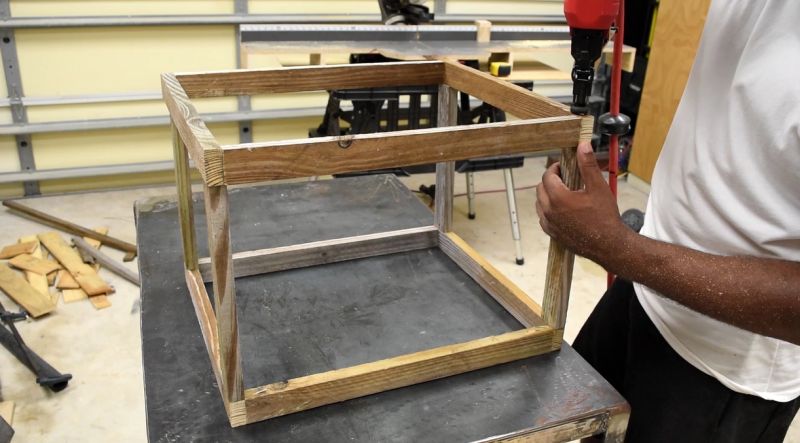
2. Build the frame using a smash gun
 View in gallery
 Using a nail gun, put together the wood pieces for the frame. You lot could also practice this with screws just you need to make certain y'all don't split the woods so always pre-drill the holes. Make two foursquare or rectangular frames, one for the meridian and ane for the bottom. Then connect them with the remaining frame boards by nailing these to the corners of the frames y'all've already put together.
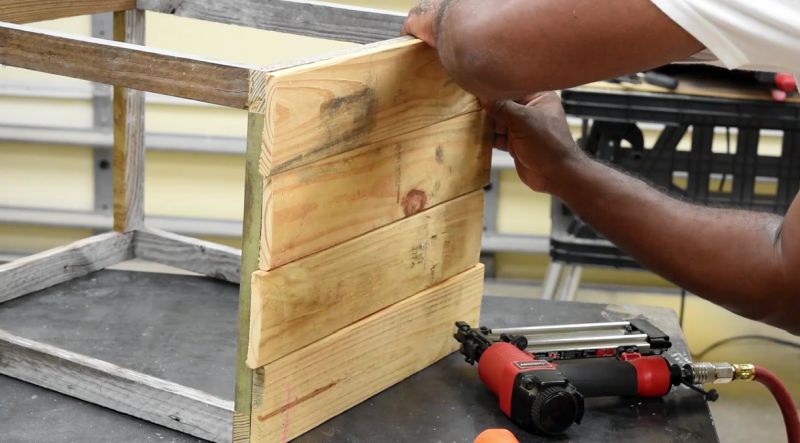
3. Adhere pallet boards to the outside of the frame
 View in gallery
 And then y'all need to start attaching the pallet pieces to the outside of the frame to arrive stiff and sturdy. You tin can utilise small nails for this role. Offset every other board to make them look equally if they're interlocking. This will add together strength to the planter and it too makes the installation pretty fun and piece of cake.
4. Install the bottom
 View in gallery
 After y'all've covered ii sides of the planter with pallet boards, it's time to install the bottom. Then continue with the other two sides. You can nail these to the frame just it would be all-time to also add a few screws for actress strength.
5. Make a trim effectually the interior
 View in gallery
 In one case you're washed with the frame itself, you tin use a few pallet pieces to create a trim effectually the interior of the planter. You tin later use this space to place some decorative rocks or gravel and give the planter a cool and zen look.
6. Sand down and paint the planter
 View in gallery
 Now your planter box is pretty much all done. You just need to use a sander to brand it all smooth around the edges and to also make it ready for the paint. And so apply a coat of paint and let it dry out. Fill in the nail holes and cover upwards any cracks. You lot can and so utilize a second glaze if you want.
7. Add together four angled legs
 View in gallery
 To keep the planter elevated from the basis, yous tin cut some pallet pieces at a 45 degree angle and brand four legs. Adhere them to the lesser of the planter box using iii screws for each, two on the exterior and one from the within of the box. Sand down the legs and then encompass them with a coat of clear polyurethane.
8. Finishing touches
 View in gallery
 At present your new planter is all done and you can go alee and identify your planter inside and so put some weed barrier material, cut out a pigsty for the plant to fit through and place it on top. Yous'll be adding some soil effectually the plant for a uniform await and then the rocks around it.
Subscribe now for more projects.
Source: https://www.homedit.com/pallet-planter/
0 Response to "DIY Planter Box From Pallets"
Post a Comment